
My first attempt at DIY home decor was a Pinterest-inspired acrylic pour canvas that turned out looking less like abstract art and more like a science experiment gone slightly wrong, and I hung it up anyway for almost a year because I’d put actual effort into it.
It wasn’t good. But it taught me something that’s held true through every DIY project since: the goal of a weekend DIY home decor project isn’t perfection, it’s making something that’s genuinely yours, and most of these projects look better once you stop chasing the flawless version you saw online.
DIY home decor ideas that are actually doable in a single weekend share a few things in common — minimal specialized tools, materials you can grab in one trip, and a process forgiving enough that a beginner’s version still looks intentional rather than obviously botched.
That’s the filter I used building this list, since a lot of DIY content online quietly assumes skills or time most people don’t have on a random Saturday.
I’m grouping these 25 projects by category — wall art and displays, textiles and soft furnishings, furniture refreshes, lighting, planters and outdoor accents, and small functional pieces — because your actual weekend plan should probably pick one or two from a category rather than trying to spread across all of them at once.
Wall Art and Displays
1. Abstract acrylic pour canvas art
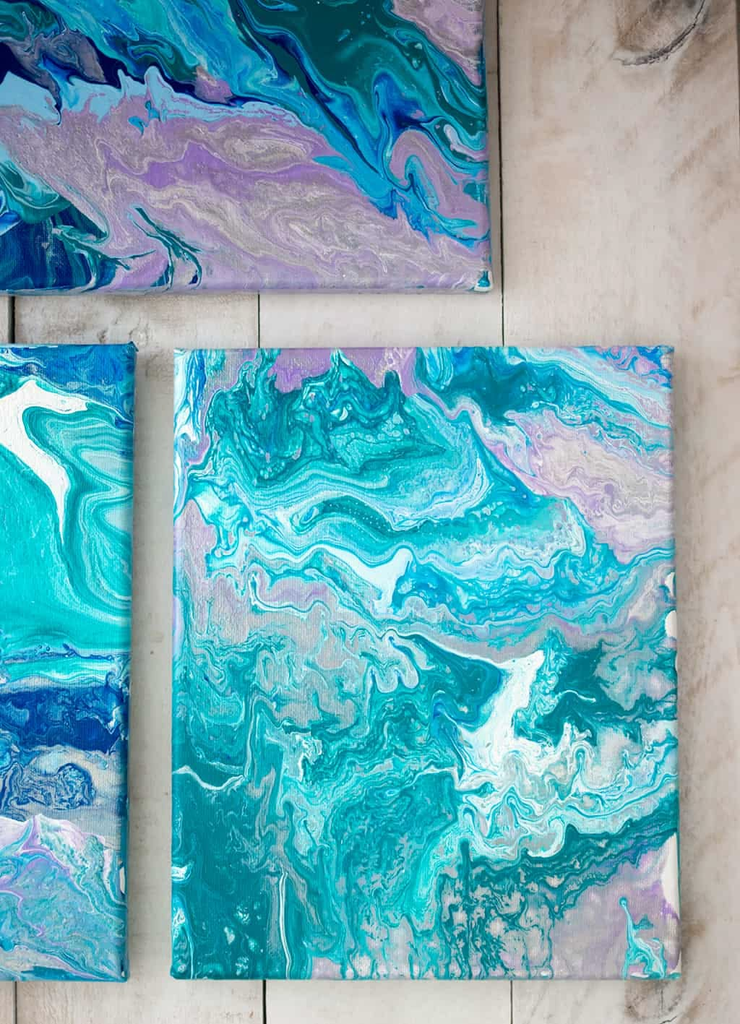
Pouring diluted acrylic paint onto a canvas in layered colors, then tilting it to let the paint flow and blend, creates genuinely striking abstract art without needing any actual painting skill, since the technique does most of the visual work for you.
My first attempt was rough, but even a rough acrylic pour has an organic, intentional quality that a beginner’s brush painting usually doesn’t.
Pro tip: Work on a large protected surface and expect some mess — the actual pouring takes minutes, but the drying and curing time is measured in days, so plan this as a Saturday project you’ll finish hanging the following weekend, not the same afternoon.
2. Pressed flower frames

Pressing flowers between heavy books for a week or two, then arranging and framing them, creates delicate, genuinely elegant wall art using materials that cost almost nothing beyond a picture frame.
This works especially well if you have flowers with personal meaning — from a bouquet, a garden, a specific trip — since the sentimental value adds something a purchased print can’t replicate.
3. DIY string art

Hammering small nails into a wood board in a pattern or shape, then wrapping colored string or thread around them in a geometric design, gives you dimensional, genuinely eye-catching wall art that’s far more forgiving of small mistakes than painting, since imperfect string tension often just adds character rather than looking like an error.
Pro tip: Sketch your pattern on paper and transfer it to the wood with a light pencil grid before hammering a single nail — freehanding nail placement is the most common reason a first string art project ends up lopsided.
4. A photo collage gallery wall

Arranging a cluster of printed photos using small adhesive squares or mini clips on twine turns blank wall space into something genuinely personal, and it’s a project that can start small on a Saturday and keep growing for months afterward rather than needing to be “finished” in one sitting.
5. Fabric-wrapped canvas panels

Stretching a patterned fabric over a plain canvas or foam board, secured with a staple gun or strong fabric glue on the back, gives you custom “art” in any pattern you like, at a fraction of the cost of framed textile art, and it’s one of the fastest projects on this entire list.
| Project Category | Typical Time Needed | Skill Level | Approx. Cost |
|---|---|---|---|
| Wall art (canvas, string art, frames) | 1-3 hours plus drying time | Beginner-friendly | $10-$40 |
| Textiles (pillow covers, dyeing) | 1-2 hours | Beginner-friendly | $10-$30 |
| Furniture refresh (paint, hardware) | Half day to full weekend | Beginner to moderate | $20-$80 |
| Lighting (mason jars, lampshades) | 1-2 hours | Beginner-friendly | $15-$40 |
| Planters and outdoor accents | 1-2 hours plus cure time | Beginner-friendly | $10-$35 |
Textiles and Soft Furnishings
6. No-sew throw pillow covers
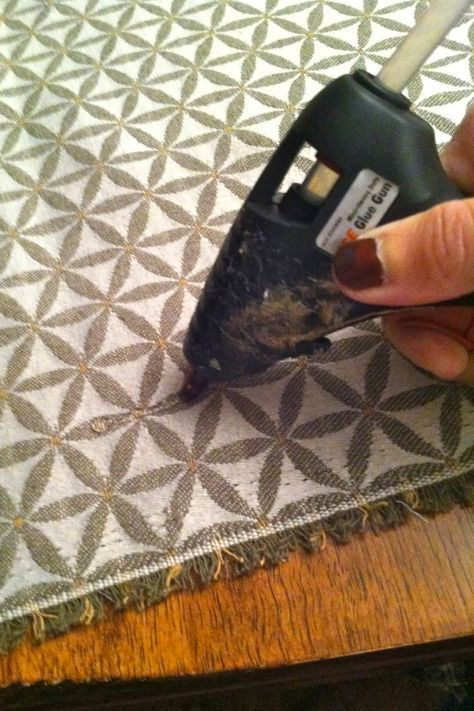
Using fabric glue or fusible hem tape instead of a sewing machine, you can wrap and secure fabric around an existing pillow insert to create a completely new cover in under an hour, which is the fastest way to refresh a couch’s whole look without buying new pillows entirely.
Pro tip: Choose a fabric with a slight stiffness, like canvas or twill, rather than something very lightweight — no-sew methods hold a structured fabric’s folds and seams far more reliably than a thin, drapey fabric that tends to shift and pull away from the adhesive over time.
7. Dip-dyed table linens
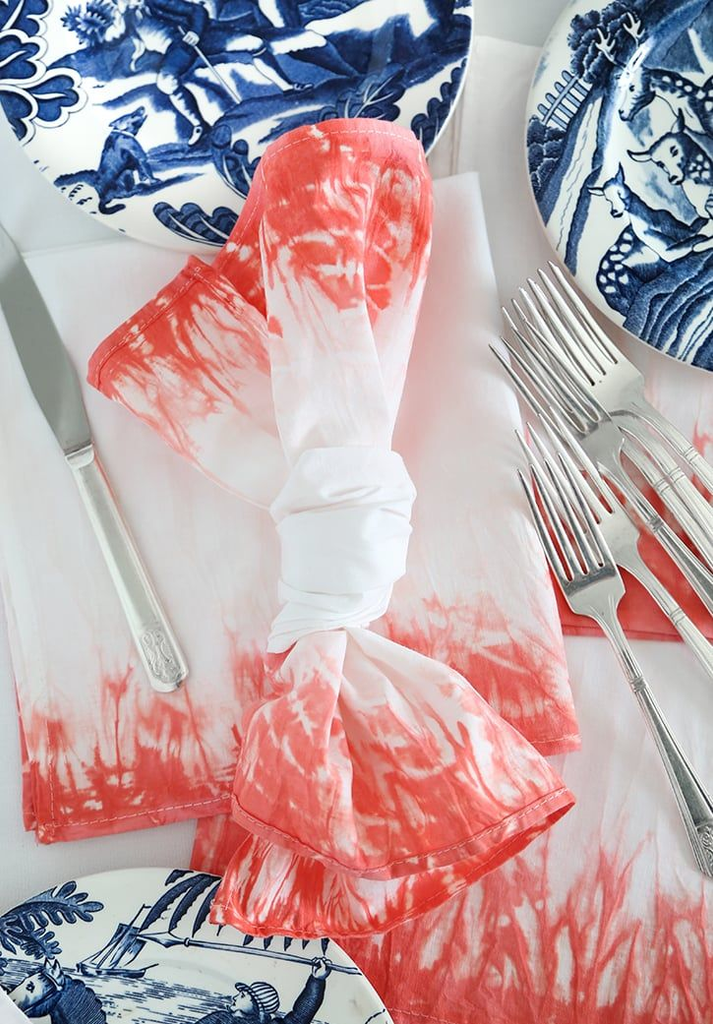
Dipping the ends of plain cotton napkins or a tablecloth into fabric dye creates a gradient ombre effect that looks far more intentional and higher-end than the actual effort involved, and it’s a genuinely forgiving technique since slight unevenness in the dip just adds to the organic, handmade look.
8. A DIY tassel garland
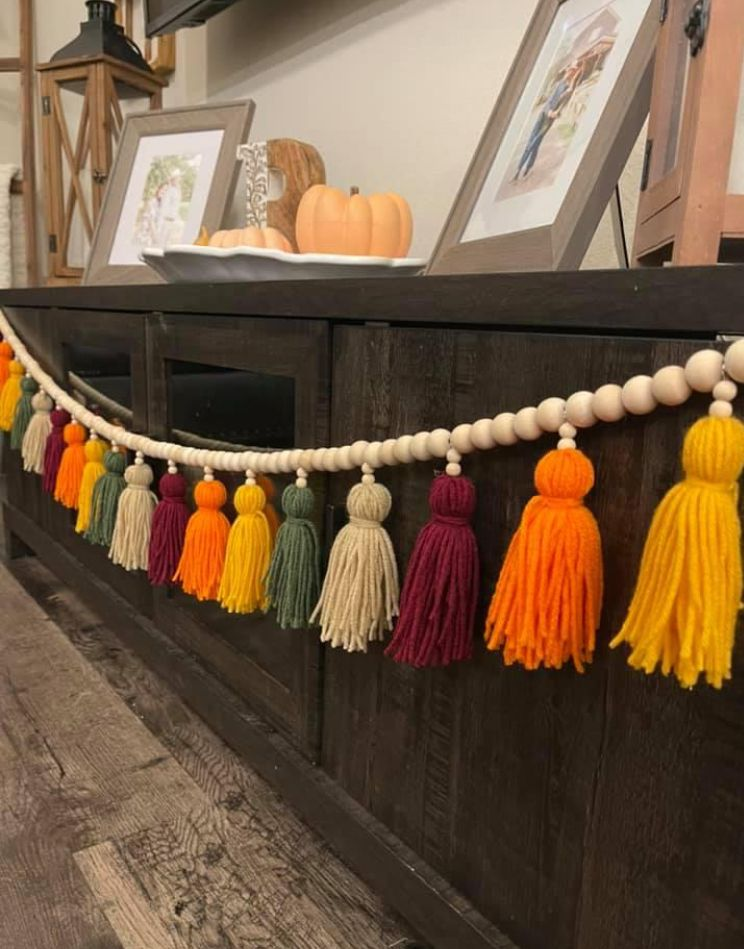
Wrapping yarn or embroidery thread around a piece of cardboard, cutting one end, and tying off a bundle of loops creates tassels you can then string together into a garland for a shelf, a mirror, or a doorway — a genuinely quick project with a big visual payoff for a party or just a permanent decor accent.
9. Reupholstering a small stool or chair seat
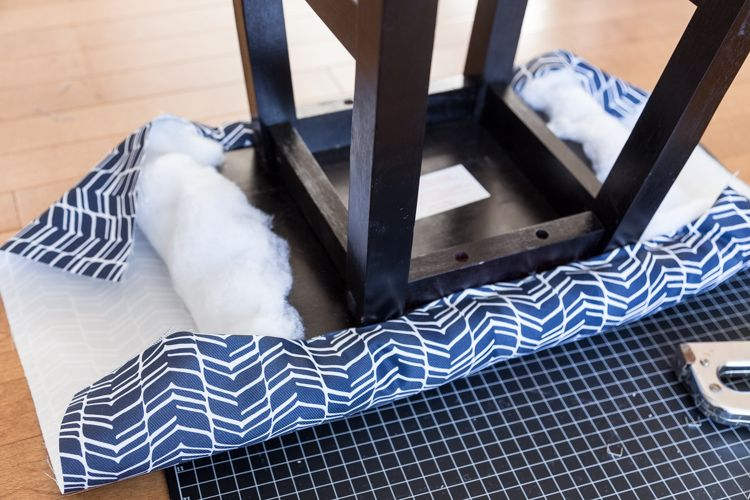
Removing an old, worn seat cushion, wrapping it in new fabric, and stapling it in place on the underside is one of the more satisfying beginner upholstery projects, since a single small stool seat is forgiving enough to practice on before attempting anything larger.
Pro tip: Pull your fabric taut in opposite pairs — top then bottom, left then right — rather than working around the seat in one direction, since stapling sequentially around the edge tends to create uneven puckers that pulling in opposing pairs avoids.
10. A stenciled drop cloth area rug
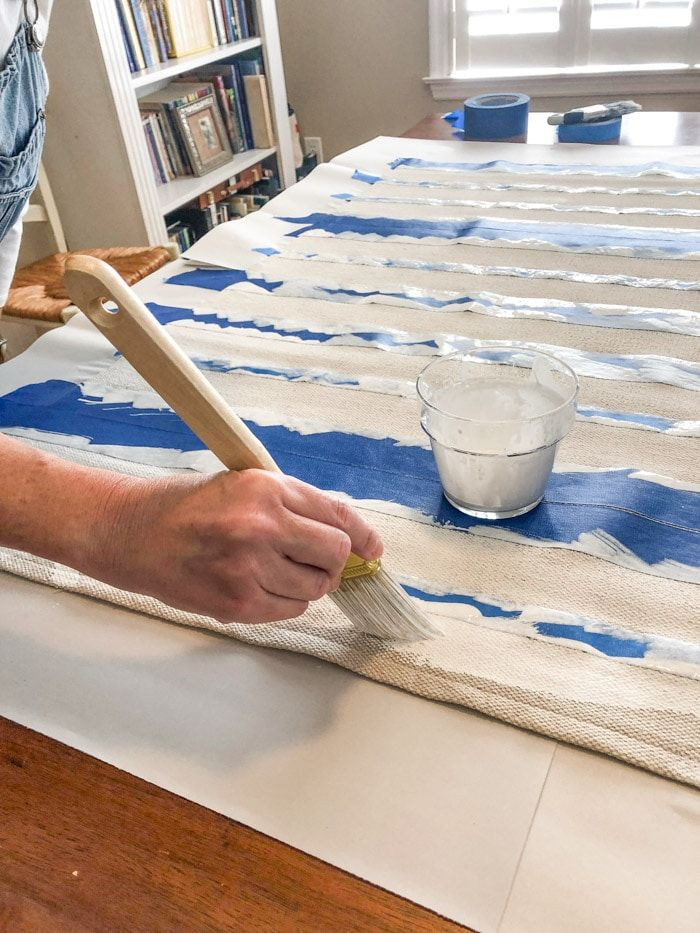
A plain canvas drop cloth, painted with a stenciled geometric pattern using fabric-safe paint, creates a large, genuinely durable area rug at a fraction of the cost of a store-bought version, and it’s a favorite specifically for anyone wanting a bold pattern that’s hard to find ready-made in the right size.
Furniture Refreshes
11. A painted furniture makeover
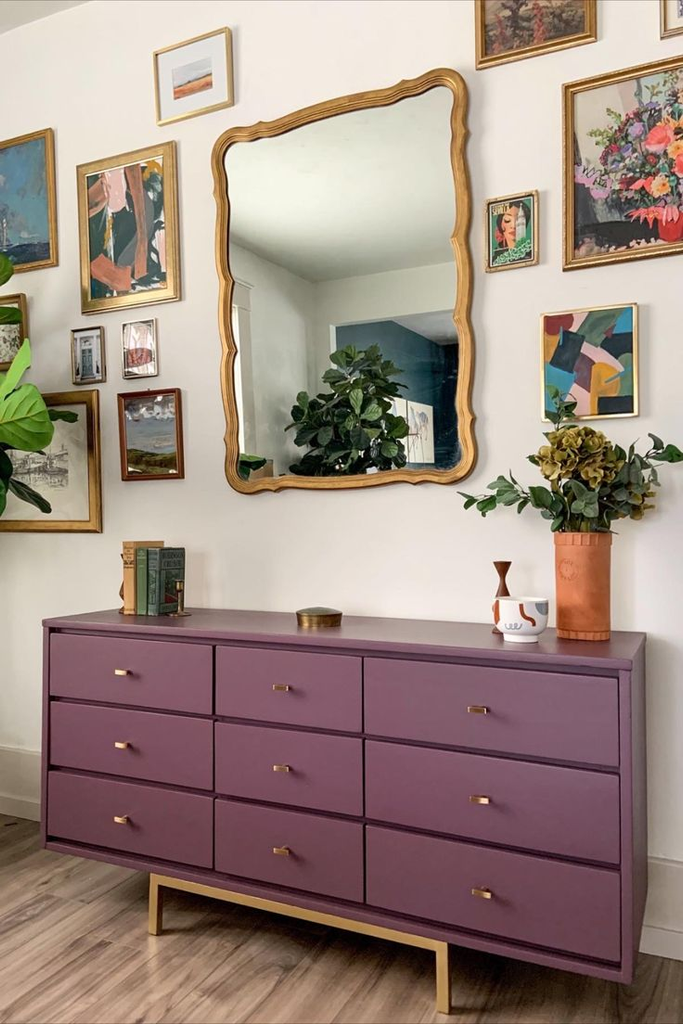
Sanding lightly, priming, and repainting an old dresser, side table, or bookshelf in a new color is one of the highest-impact DIY projects on this entire list relative to the cost, since a single piece of furniture can completely shift a room’s whole color story.
My friend Amelia found a scratched-up dresser at a yard sale for eight dollars and repainted it a deep navy over one weekend, and it’s now the first thing people notice in her bedroom — more compliments than several pieces she actually paid full price for.
Pro tip: Don’t skip a light sanding step even on furniture that looks smooth already — a quick pass with fine-grit sandpaper gives paint something to actually grip, and skipping this is the single most common reason a furniture paint job chips within a few months.
12. Updated cabinet hardware with a coat of spray paint
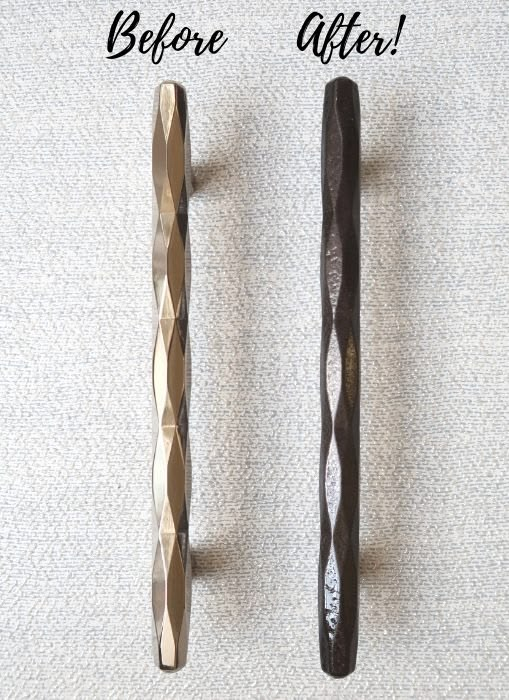
Rather than buying entirely new knobs and pulls, a coat of metallic or matte spray paint on your existing hardware gives you a genuinely different finish for a fraction of the cost, and it’s reversible if you decide you don’t love it, since the original hardware is still underneath.
13. A decoupage furniture surface
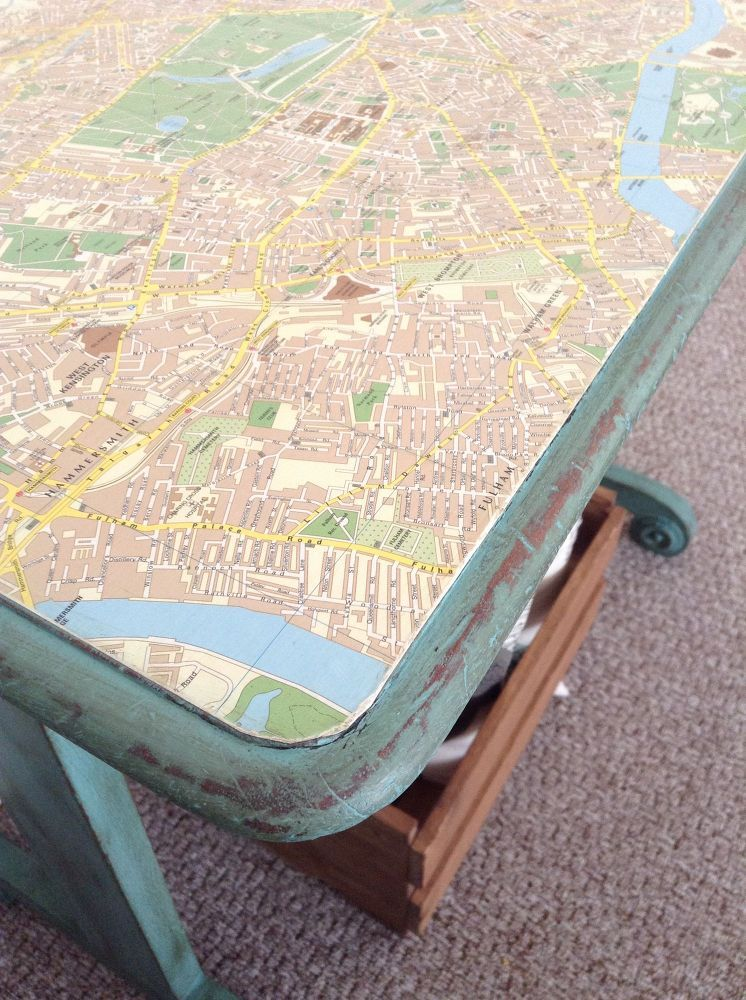
Applying paper — decorative scrapbook paper, sheet music, maps — to a furniture surface with decoupage medium creates a genuinely custom, one-of-a-kind look on a plain dresser top or drawer fronts, and it’s a forgiving technique since small paper overlaps and imperfections tend to look intentional rather than like mistakes.
14. A whitewashed wood finish
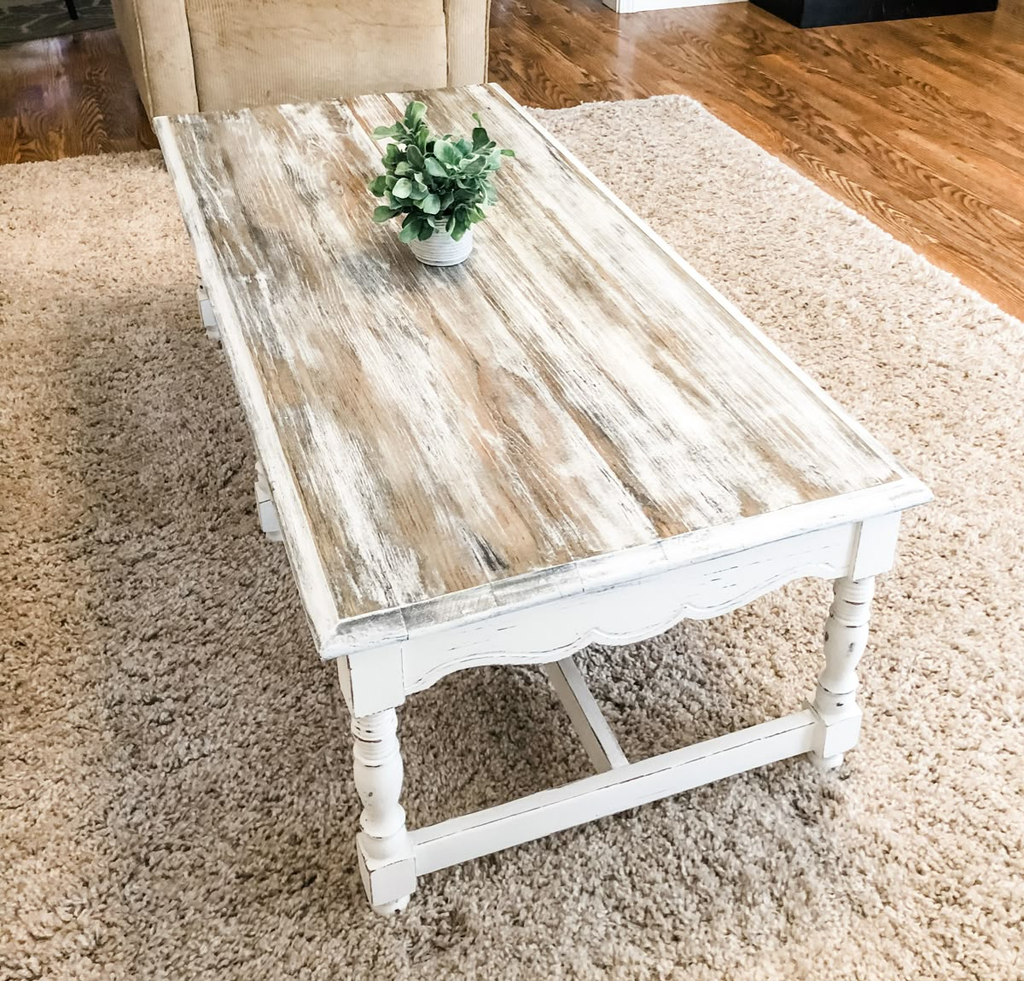
Diluting white paint and wiping it onto raw or lightly sanded wood furniture creates a whitewashed, farmhouse-style finish that lets the wood grain show through, giving furniture a lighter, more casual look without the full commitment of a solid opaque paint color.
Pro tip: Test your paint-to-water dilution ratio on a hidden section first — too thick and you lose the wood grain effect entirely, too thin and it barely shows up, and the right ratio varies noticeably between different wood types and paint brands.
15. Color-dipped furniture legs
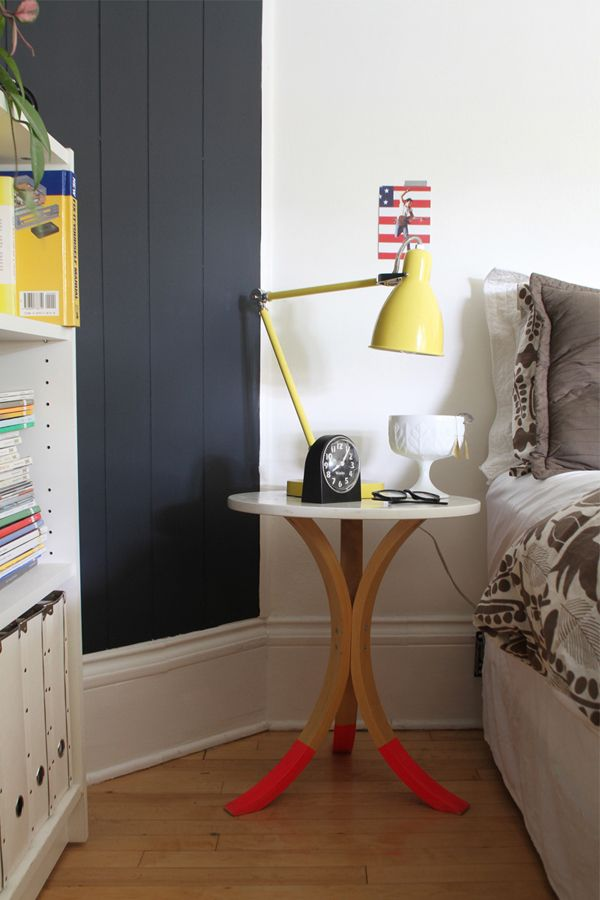
Painting just the lower few inches of a table or chair’s legs in a bold contrasting color, taped off cleanly from the rest of the piece, is a small, low-commitment way to modernize an otherwise plain or dated piece of furniture without repainting the whole thing.
Lighting Projects
16. A mason jar pendant light
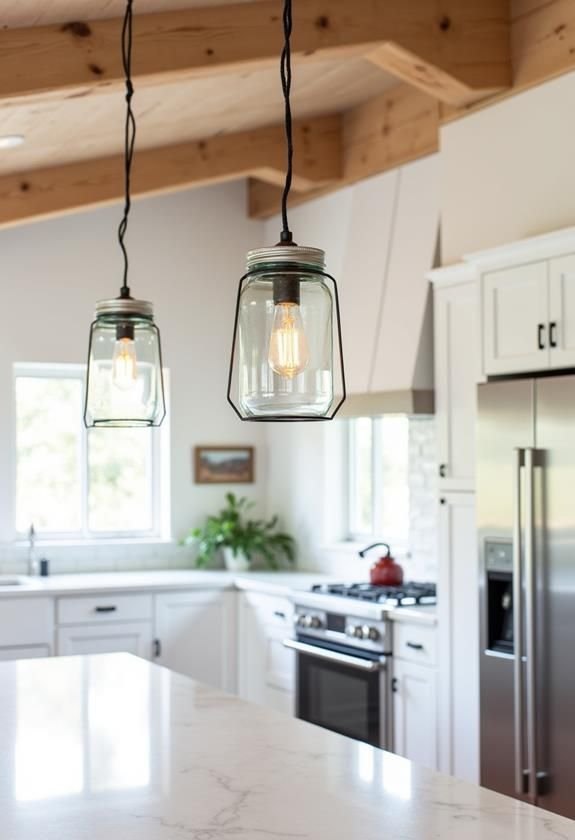
Fitting a mason jar with a pendant light kit — available as a simple hardware conversion kit — creates a rustic, genuinely charming light fixture for a kitchen island or dining area, and it’s one of the more popular weekend electrical-adjacent projects specifically because the kits make it accessible without needing real wiring knowledge.
17. A rope-wrapped lamp base
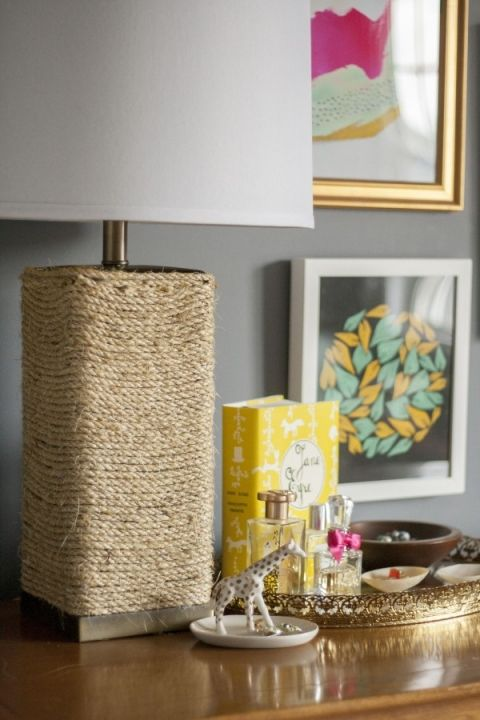
Wrapping a plain lamp base in natural jute or cotton rope, secured with hot glue at the top and bottom, transforms a basic lamp into something with genuine texture and a coastal or organic-modern feel, and it’s one of the fastest projects on this entire list.
18. A painted or stenciled lampshade

A plain fabric or paper lampshade takes on a completely new look with a coat of paint, a stenciled pattern, or even a wrapped fabric covering, and it’s a far cheaper refresh than buying an entirely new shade for a lamp you otherwise still like.
Pro tip: Test any paint on a lampshade with the lamp turned on before committing to the whole shade — some paints go noticeably darker or more opaque once backlit than they appear in daylight, which changes the whole effect once the lamp is actually in use.
19. Mason jar string light lanterns
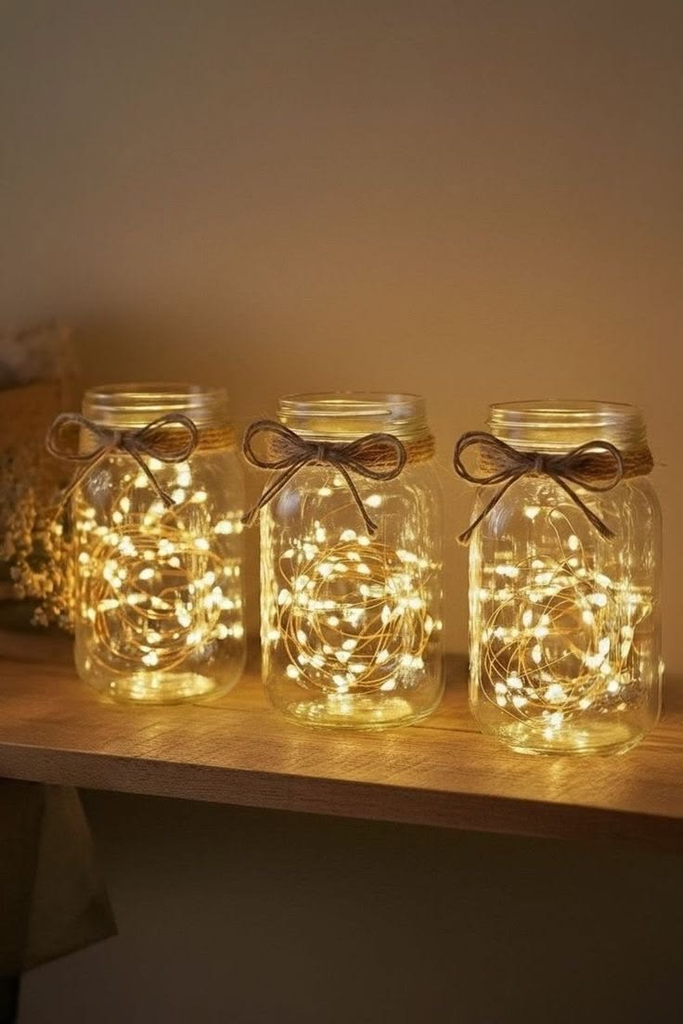
Placing battery-powered string lights inside mason jars creates simple, warm lantern-style lighting for a shelf, a mantel, or an outdoor space, and it’s genuinely one of the lowest-effort, highest-charm projects on this whole list.
Planters and Outdoor Accents
20. Painted terracotta planters

Plain terracotta pots take painted patterns and designs beautifully, since the porous surface holds paint well, and a set of hand-painted pots in coordinating patterns gives an entryway or windowsill a genuinely custom look for the cost of a few pots and some acrylic paint.
21. A pallet vertical planter

Repurposing a wooden shipping pallet, lightly sanded and stained or painted, into a vertical planter maximizes growing space in a small yard or balcony and gives outdoor plants a genuinely rustic, intentional display rather than a row of mismatched pots on the ground.
Pro tip: Line the back and bottom of each pallet slat pocket with landscape fabric before adding soil — skipping this step is the most common reason a pallet planter ends up shedding dirt everywhere every time it’s watered.
22. A small concrete planter pour

Pouring quick-set concrete into a simple mold — even a plastic container or a milk carton — creates a modern, genuinely sturdy planter that looks far more expensive than the actual materials cost, and it’s a satisfying weekend project specifically because the transformation from liquid concrete to a finished object happens within a single day.
Small Functional Decor Pieces
23. DIY resin or tile coasters
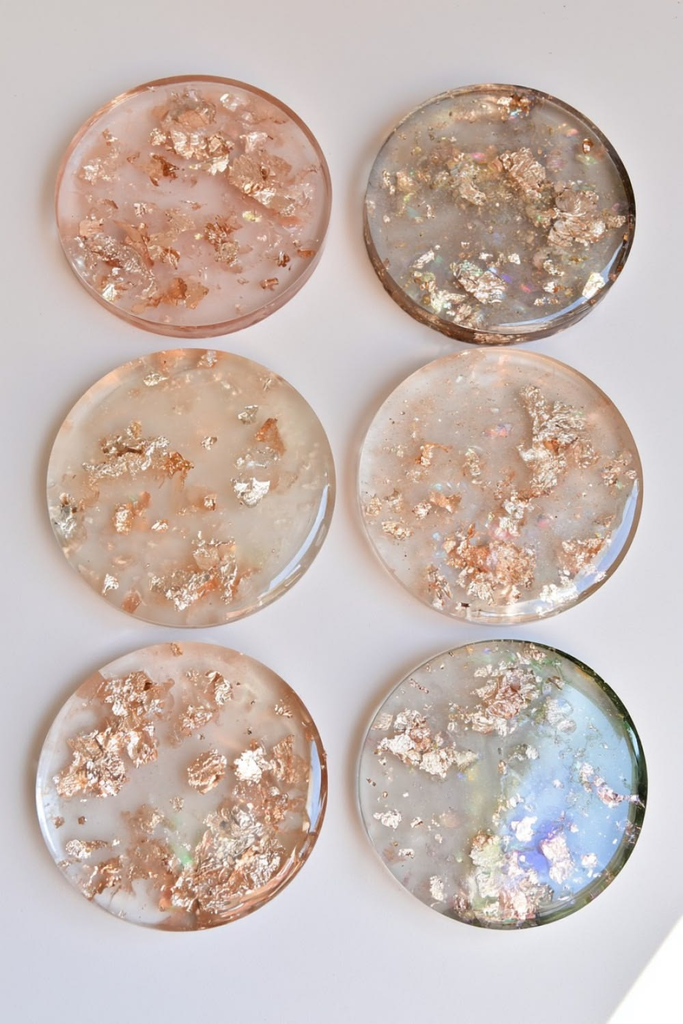
Pouring colored resin into small silicone molds, or decorating plain ceramic tiles with paint and a sealant, creates a set of genuinely durable, custom coasters that make a noticeably nicer gift or personal touch than anything you’d typically find at a similar price point in a store.
Pro tip: Work in a well-ventilated area if using resin specifically, and follow the exact mixing ratio on the packaging — resin that’s even slightly off-ratio can stay tacky indefinitely instead of curing properly, which is the most common beginner frustration with this project.
24. A DIY wood serving tray with handles
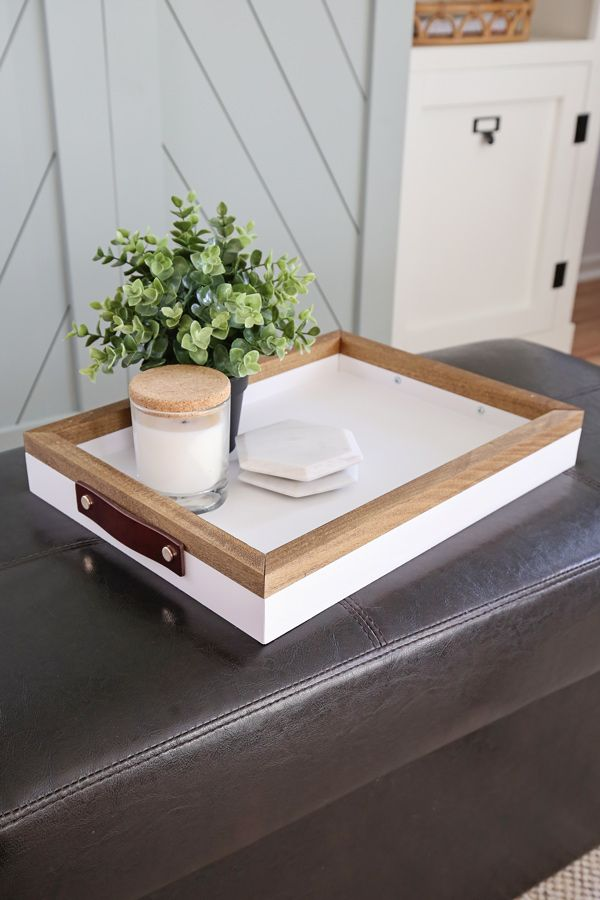
Assembling a simple wood tray from a few boards, with rope or leather handles attached at either end, gives you a genuinely functional piece that also works purely as decor when it’s not actively holding anything, styled on an ottoman or coffee table.
25. A painted or stenciled memo board
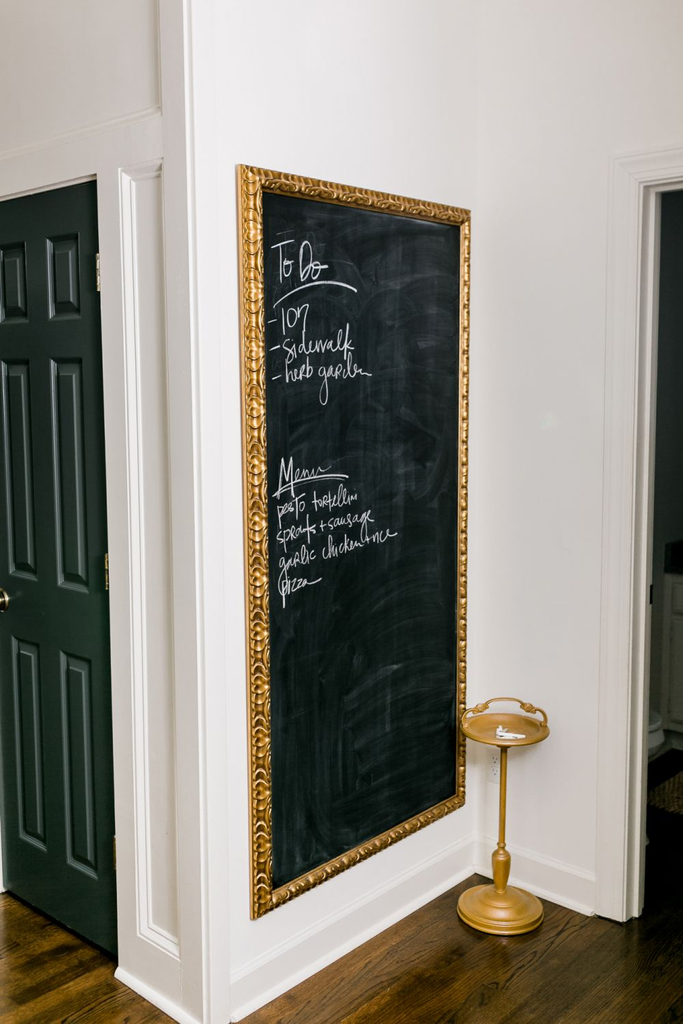
Repurposing a plain wood board or an old picture frame’s backing into a chalkboard or dry-erase memo board, painted with the appropriate specialty paint, gives you a functional daily-use piece that also adds genuine personality to an entryway or kitchen wall.
What I’d Actually Recommend Starting With
If you’re picking just one project for an actual free weekend, I’d start with either the painted furniture makeover or the no-sew pillow covers, depending on how much time you genuinely have — the furniture project has the bigger visual payoff but needs a full day including drying time, while the pillow covers can be finished start to finish in under an hour if your weekend is more fragmented than free.
Looking back at that rough first acrylic pour canvas still hanging in my old apartment for a year, the real thing I’d tell anyone starting their first DIY home decor project is that the finished piece doesn’t need to be perfect to be worth keeping.
Almost every project on this list gets more forgiving of small mistakes the more textured or organic the technique is, and the ones that turn out a little rough usually still look more interesting than a mass-produced version would have.


Leave a Reply