
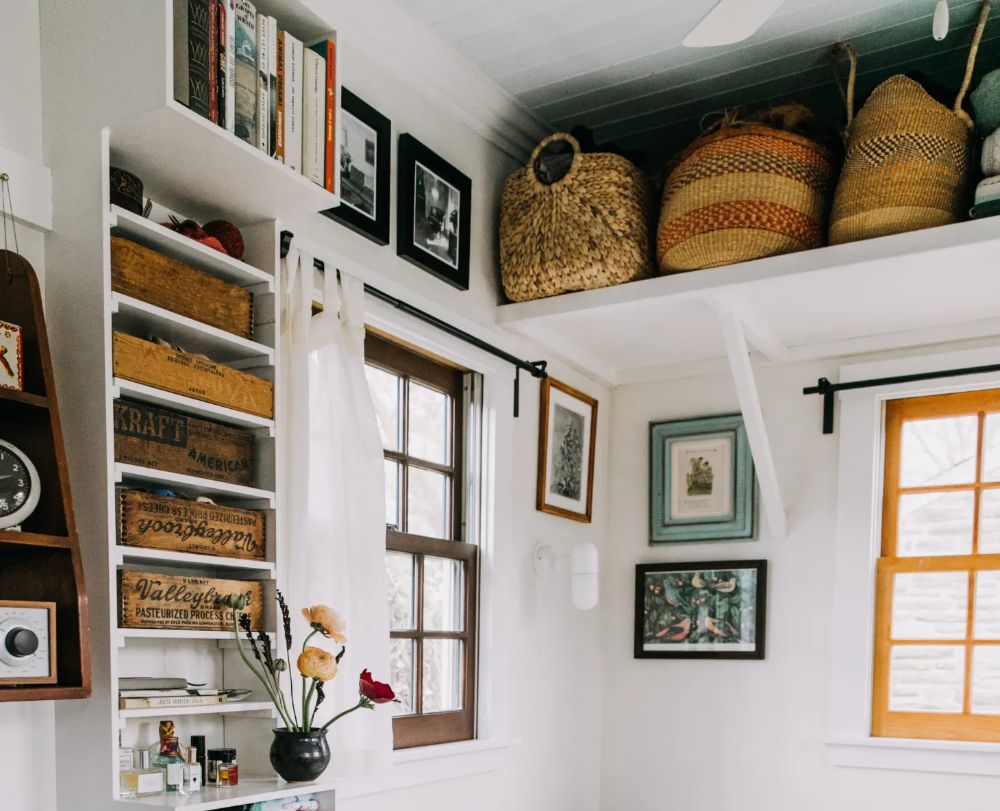
I lived in a 410-square-foot studio for two years before I figured out the thing nobody tells you about small apartments: the floor was never the problem. I had maybe 380 square feet of usable floor and roughly 3,000 cubic feet of air above my head that I was doing absolutely nothing with.
Once I started treating my walls like real estate instead of just something to hang art on, the apartment didn’t get bigger, but it stopped feeling like I was living inside a shoebox.
If you’re renting a small apartment — studio, one-bedroom, doesn’t matter — you’ve probably already bought the under-bed bins and the over-the-door shoe rack. Those help, but they’re the beginner moves.
Maximizing vertical space in a small apartment is really about picking the right zones to go up in, the right hardware to do it with (especially if you’re renting and can’t drill holes wherever you want), and knowing which vertical storage ideas are worth the money and which ones fall apart in a month.
I’m going to go zone by zone — kitchen, closet, bathroom, entryway, living room, bedroom, and workspace — because “go vertical” means something completely different in a kitchen than it does in a closet.
Along the way I’ll tell you what’s actually held up in my apartment and my friends’ apartments, what I’d skip, and where the money is actually worth spending versus where you can go cheap.
First, the Two Rules That Actually Matter
Before the room-by-room stuff, two things I wish someone had told me:
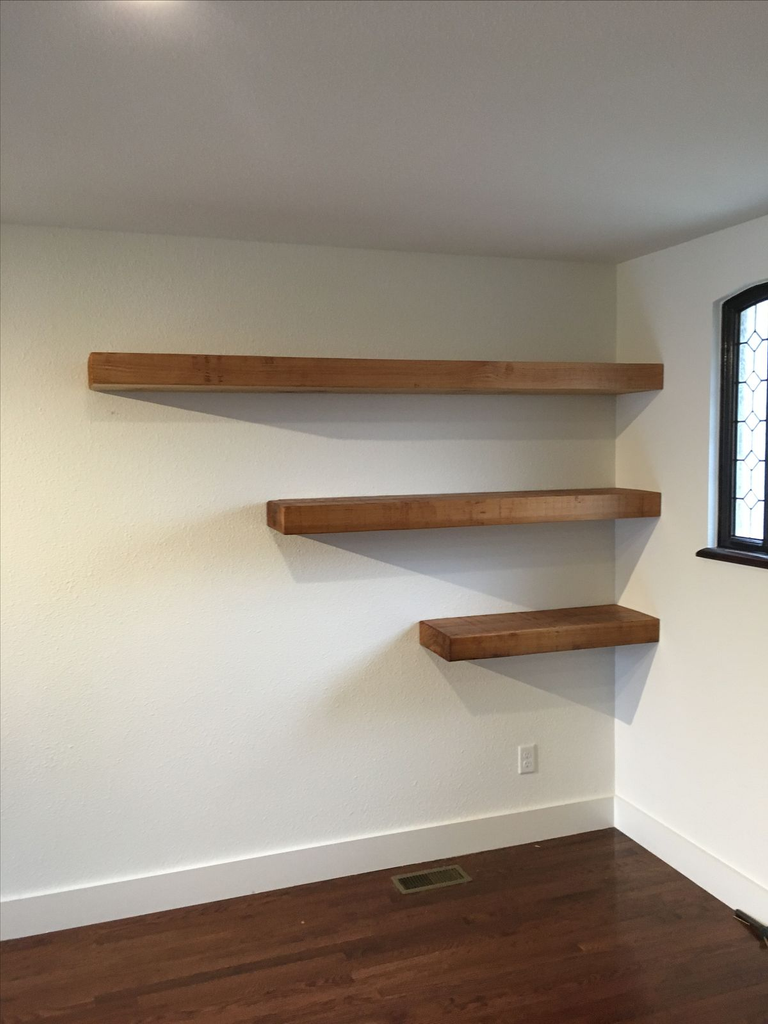
Know your wall type and your weight limits. Drywall with no stud is not your friend for anything heavier than a picture frame. A basic drywall anchor rated for 20-25 lbs is fine for a small shelf with books; it is not fine for a shelf holding cast iron pans, which is exactly the mistake my downstairs neighbor Priya made with a $14 Amazon shelf that came down at 6 a.m. and woke up her whole floor.
If you don’t know where your studs are, a $10 stud finder pays for itself the first time you use it.
Rental-friendly doesn’t mean flimsy. Command strips and hooks have genuinely gotten better — the current large “outdoor” rated Command hooks hold up to 7.5 lbs and I’ve had ones up for over a year without falling.
But they need a clean, smooth surface (textured or freshly painted walls need 24-48 hours cure time before you stick anything) and they are not a substitute for real hardware when you’re talking about anything above 10-15 lbs or anything that could hurt someone if it fell — that’s when you want a tension-mounted or freestanding solution instead of adhesive.
Pro tip: if your lease is unclear on wall damage, take photos of your walls before you mount anything and keep a small tube of spackle and touch-up paint on hand. Command strips will still take a little paint off if you don’t pull them using the stretch-release tab correctly — pull straight down and slow, not out.
The Kitchen: Where Vertical Space Pays Off the Fastest
Kitchens are usually the most cramped room in a small apartment because you can’t really compromise on counter space — you need it to cook — which means almost everything else has to go up or go away.
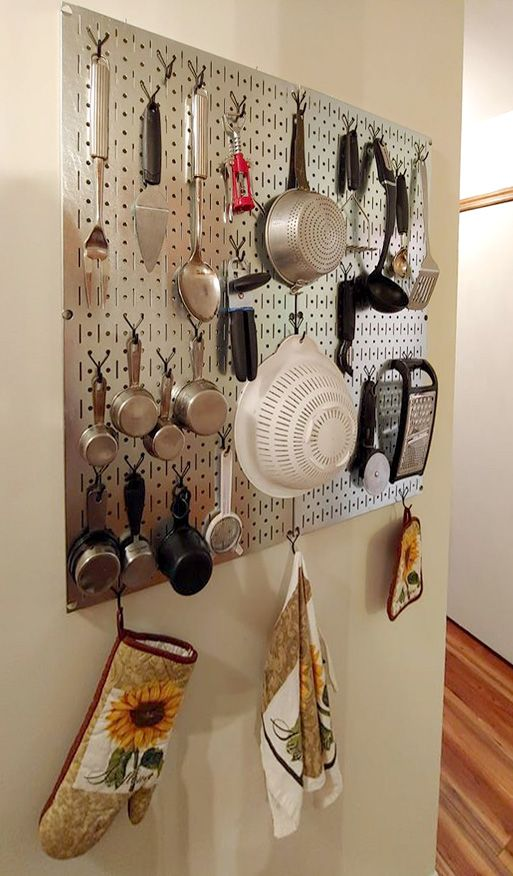
Pegboard above the counter or stove. This is the one I’d tell anyone to do first. A pegboard mounted with cleats (so it’s not directly drilled into the wall in 20 places, which matters if you’re renting) turns 6-8 square feet of dead wall into hanging storage for pots, utensils, cutting boards, even small potted herbs on little shelf hooks.
My friend Deniz did this in her galley kitchen and got her pots and pans — which used to eat an entire lower cabinet — completely off the counter and off the floor.
Wall-mounted magnetic knife strip. Obvious, but worth saying: this alone can clear out a whole drawer. Get one rated for at least 12 lbs of holding weight if you have a full knife block’s worth of knives.
Stacking shelf risers inside cabinets, not just on the counter. Most people put a riser on their counter and stop there. The bigger win is a two-tier riser inside your cabinets so you’re not stacking plates eight high and playing Jenga every time you need the one on the bottom.
Over-the-sink or over-stove shelf. These clamp onto the edge of the sink or slot above the stovetop and give you a spice or dish-drying shelf that uses zero counter space. I was skeptical of mine until I actually used the counter space back for prep.
Pro tip: skip the tension-rod-mounted pot rack that hangs from the ceiling if you have low ceilings (under 8 feet) — I’ve had two friends hit their heads on theirs within a week and take them back down. A wall-mounted rail system is the better version of the same idea.
Closets: Doubling Your Hanging Space
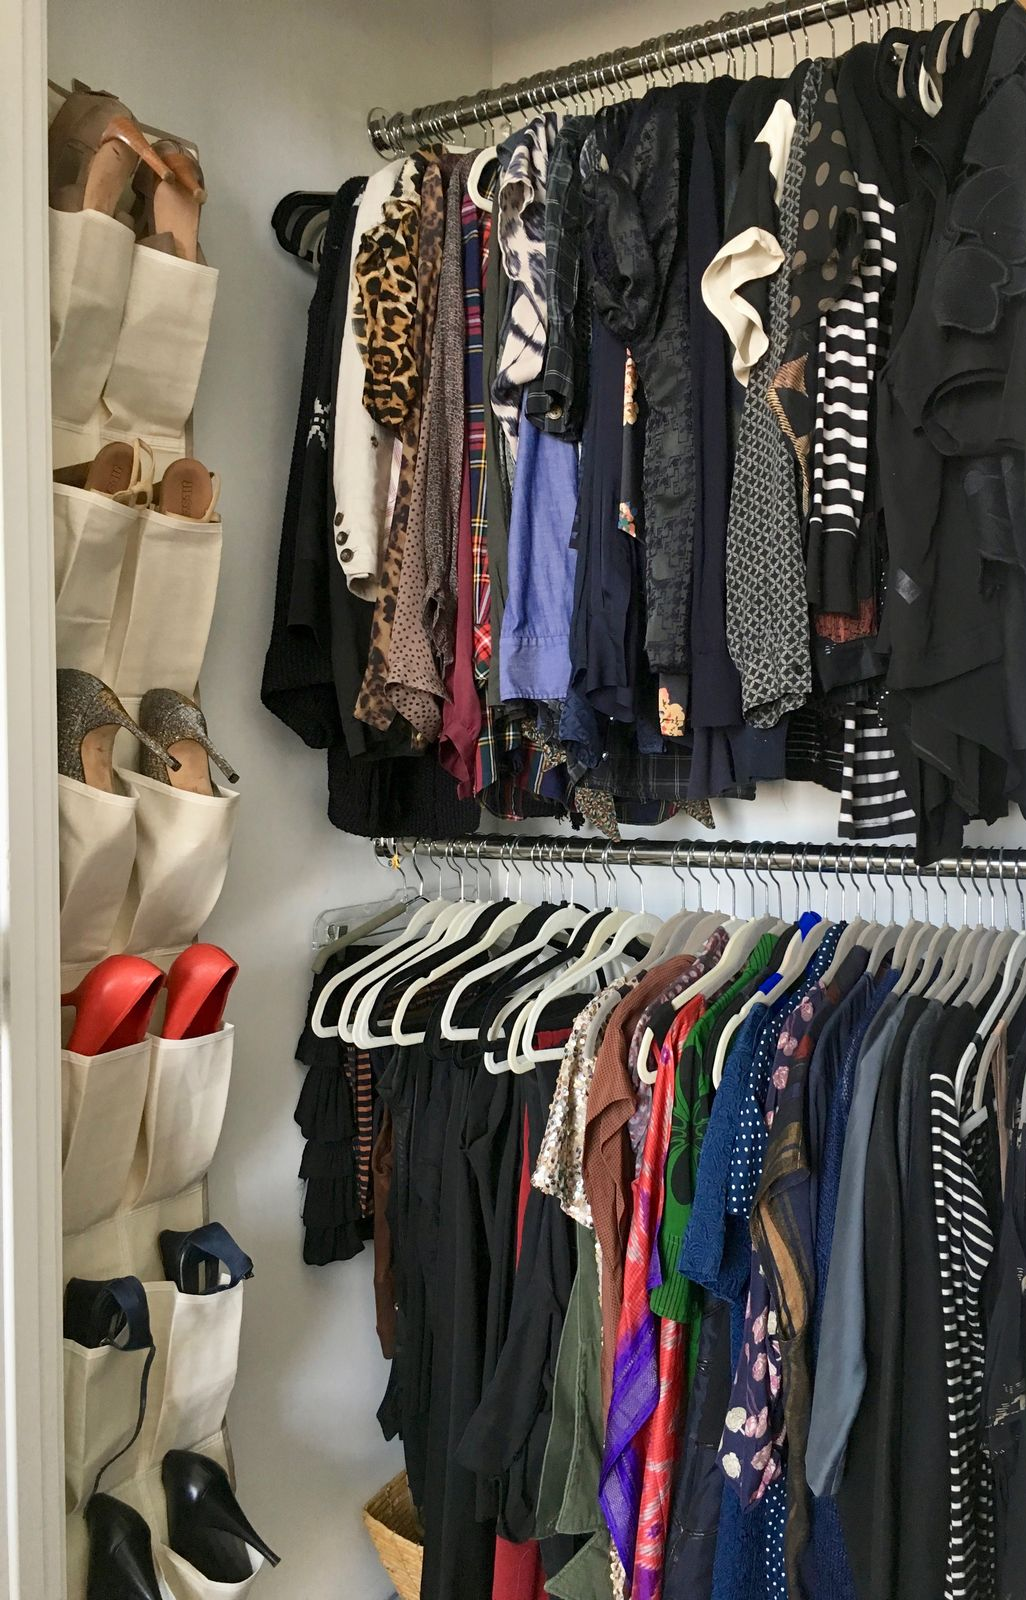
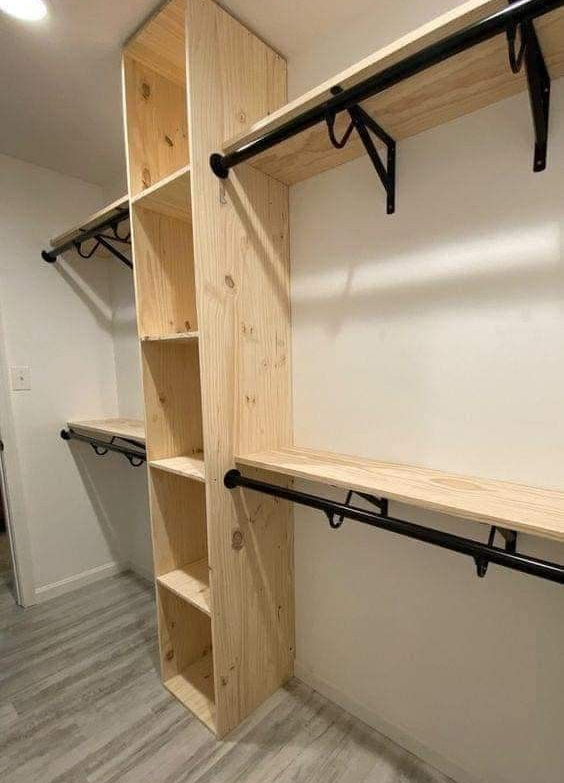
If you only do one vertical project in your whole apartment, closet doubling has the best ratio of effort to payoff, because closets are usually only using the top third of their actual height.
A second closet rod, hung lower. Most closet rods are hung at a height meant for full-length dresses and coats, which most people don’t have that many of. Adding a second rod 30-40 inches below the first one, sized for shirts, folded pants, and skirts, can roughly double your hanging capacity.
This works with an actual second rod bracket (cheap, semi-permanent, totally reversible) or with hanging closet-rod extenders that clip onto your existing rod — the clip-on kind hold less weight (check the rating, usually 20-30 lbs) but need zero hardware.
Over-the-door organizers, and this is the one category I’ll actually warn you about: the flimsy wire ones with the metal hooks that go over the door are hit or miss. Mine held for about eight months before the plastic coating cracked and it started rusting.
If you’re going to spend money here, spend it on a canvas or fabric one with reinforced grommets — it costs maybe $10 more and lasts years instead of months.
Vertical shoe racks or a shoe cubby that stacks, rather than the shoe pile on the closet floor. This sounds minor but shoe piles are one of the biggest floor-space wasters in small closets and nobody thinks of them as a “vertical” problem until you stack a shoe organizer against the wall and realize you just got back two square feet of floor.
Closet Storage Comparison
| Option | Cost | Weight Capacity | Best For | Watch Out For |
|---|---|---|---|---|
| Second closet rod (bracket-mounted) | $15–30 | High (holds full rod load) | Renters who can patch small holes | Needs drilling; measure clearance first |
| Clip-on rod extender | $10–20 | 20–30 lbs | No-drill rentals | Lower weight limit, can sag over time |
| Stackable shoe cubbies | $20–40 | Light–medium | Any closet with floor clutter | Cheap plastic ones warp in humidity |
| Canvas over-door organizer | $20–35 | Light–medium | Accessories, folded items | Skip the wire/metal versions — they rust |
| Wall-mounted shelving above rod | $30–80 | Medium–high (with studs) | Off-season or bulky items | Needs stud anchors for real weight |
The Bathroom: Small Room, Biggest Percentage Gain
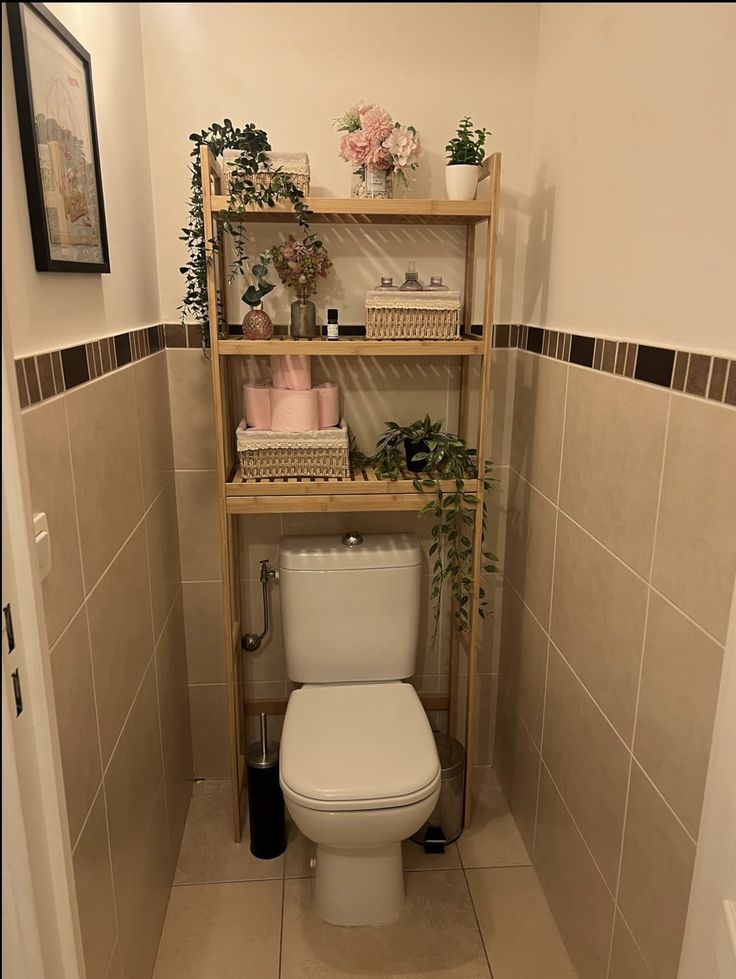
Bathrooms in small apartments are usually the tightest room percentage-wise, so vertical storage does more visible work here than almost anywhere else.
Over-the-toilet étagère or shelving unit. This is the classic move for a reason — it’s dead space in basically every apartment bathroom. The tension-pole versions (no drilling, adjustable to your ceiling height) are the rental-friendly option; freestanding ladder-style ones work if your toilet tank has a flat top edge to anchor against, but check the weight distribution before loading the top shelf with anything heavy.
Tension rod under the sink, mounted horizontally about halfway up the cabinet, lets you hang spray bottles by their trigger handles from the rod instead of them taking up shelf footprint. It sounds too simple to work and it’s one of my favorite $6 fixes.
A vertical hair tool organizer mounted to the inside of a cabinet door or on the wall next to an outlet — for anyone dealing with a curling iron, straightener, and blow dryer taking up an entire drawer, this alone can free up real space, and it’s safer than tools cooling down on the counter.
Pro tip: command hooks in a bathroom need to be the “water-resistant” or specifically bathroom-rated version — the standard ones lose their grip fast with shower steam and humidity. I learned this the hard way when a shower caddy came down mid-shower.
The Entryway: Stop the Floor Pile
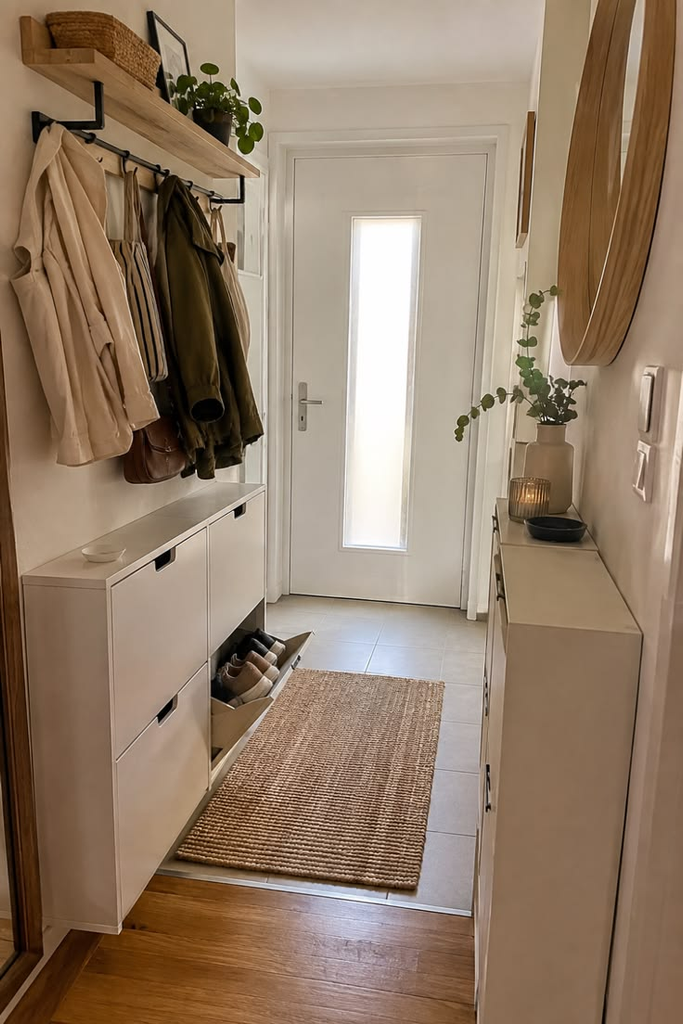
If you don’t have a coat closet (a lot of small apartments and studios don’t), your entryway needs vertical storage or it becomes the place where shoes, bags, and mail pile up on the floor — I used to trip over shoes every single morning until I put up a simple wall system.
A wall-mounted hook rail at two heights — one row around 60 inches up for coats and bags, one row around 40 inches for smaller items like keys, dog leashes, or kids’ backpacks. Two rows uses the same wall footprint as one but roughly doubles what you can hang.
A slim vertical shoe cabinet (the kind that’s only 8-10 inches deep) tucked into any leftover wall sliver near the door. These are narrow enough to fit in spots you’d never put regular furniture, and they get shoes off the floor entirely.
A floating shelf above the hook rail for a catch-all basket, mail, and keys — small, but it’s the difference between a counter covered in mail and a specific home for it.
The Living Room: Vertical Without Looking Like a Warehouse
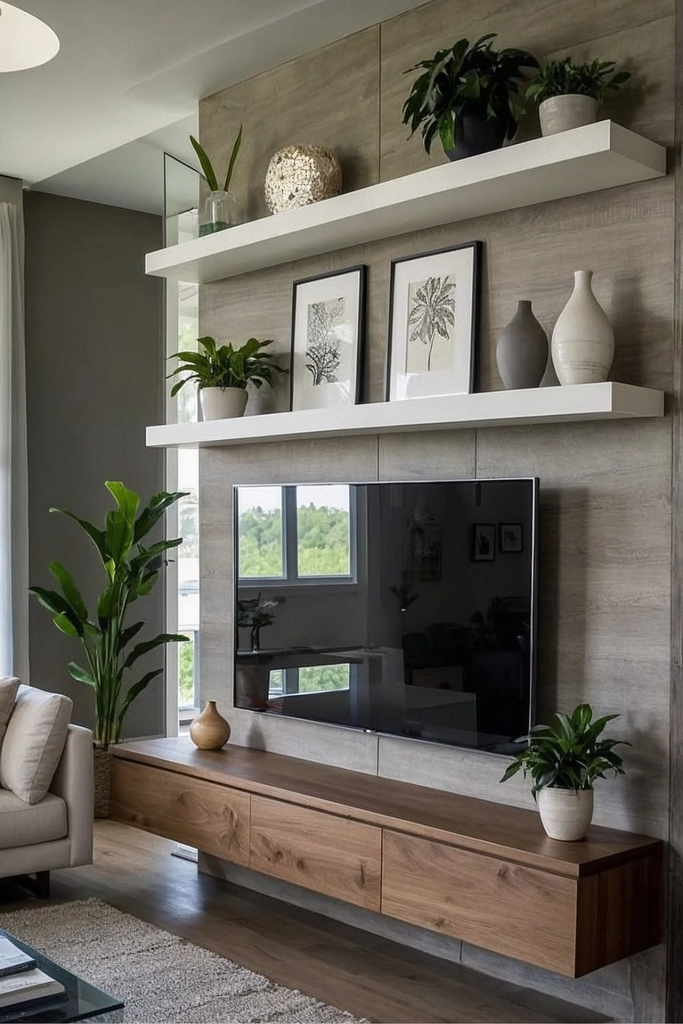
This is the room where “go vertical” can backfire aesthetically if you’re not careful — floor-to-ceiling shelving on every wall reads as storage unit, not living room. The trick is picking one or two walls to commit to and leaving the rest breathing room.
Floor-to-ceiling bookshelves on a single wall, rather than spreading storage across multiple walls. One tall, well-styled wall of shelving reads as intentional; storage furniture scattered on three walls reads as clutter, even if it’s technically less total volume.
Wall-mounted media console instead of a TV stand that sits on the floor. This one is genuinely underrated — a floating console frees up the entire floor beneath your TV for a rolled-up rug, a small ottoman, or just visual breathing room, and it makes a small living room look noticeably less boxed-in because you can see the floor continue underneath it.
A ladder shelf in a corner where a regular bookshelf wouldn’t fit flush — these lean against the wall so they don’t need drilling, and they’re one of the better options for a rental where you want height without commitment.
Pro tip: if you’re mixing shelving heights and wall art on the same wall, keep sightlines in mind — a big rule of thumb is not to stack storage so high that a seated person’s eye naturally stops at a shelf edge instead of the ceiling. It sounds small, but it’s the difference between a wall that reads “tall and airy” versus “packed.”
The Bedroom: Vertical Storage That Doesn’t Fight Your Sleep Space
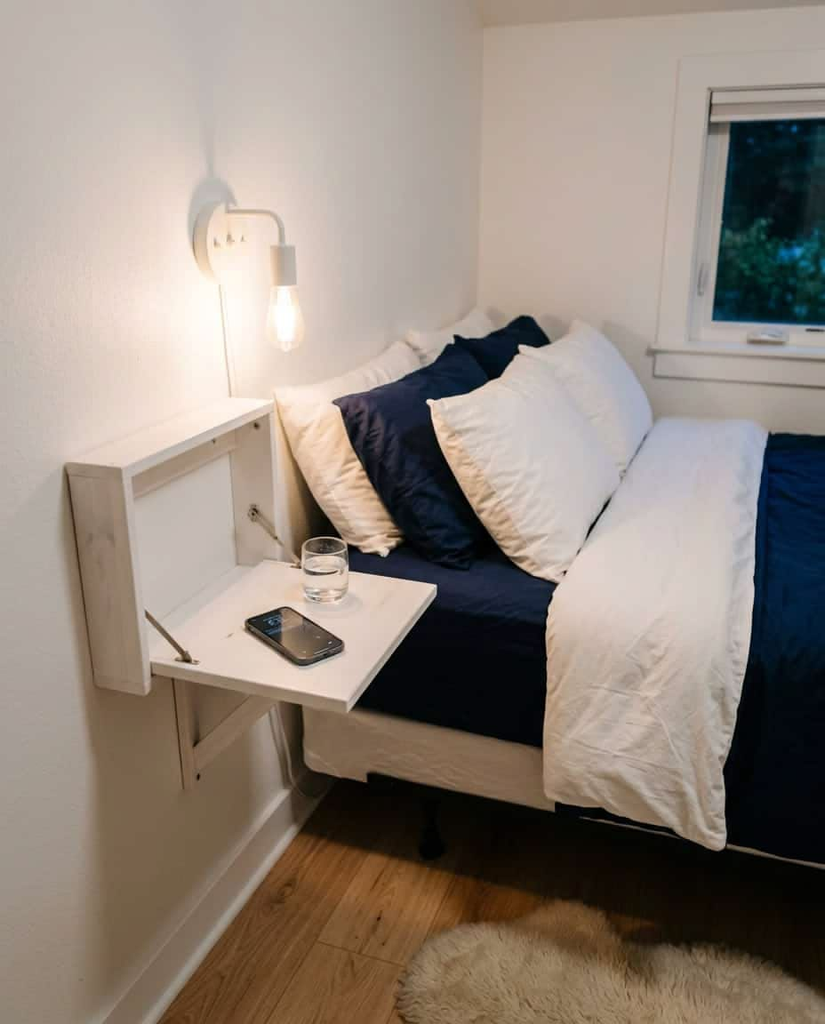
A loft-style bed frame or bed risers to open up under-bed storage. If you’re not ready to commit to an actual loft bed, risers that add 6-8 inches under a standard bed frame turn wasted crawl space into room for real storage bins — I use this for off-season clothes and it’s essentially a second, invisible closet.
Floating nightstands instead of nightstands with legs — this is a small move but it visually opens up the floor along your bed wall, which matters a lot in a small bedroom where every piece of floor-touching furniture reads as “more crowded.”
Wall-mounted reading lights instead of table lamps, freeing up your nightstand surface entirely for the two things you actually need within reach.
The Home Office Corner: Height Over Footprint
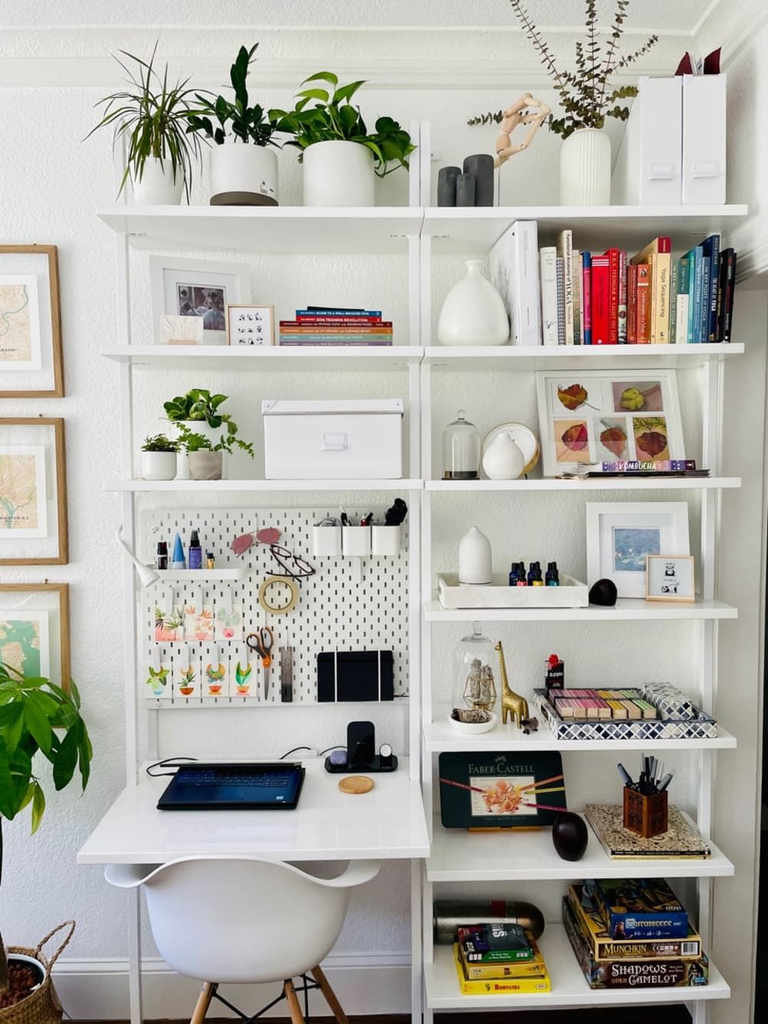
If you’re squeezing a workspace into a studio or a bedroom corner, going vertical here is about desk-adjacent storage, not the desk itself.
Wall-mounted shelving directly above the desk rather than a wide bookshelf beside it — this keeps your actual desk footprint small while giving you real storage for books, files, and supplies within arm’s reach.
A pegboard organizer above the desk for cords, chargers, and small supplies, which keeps your desk surface clear enough to actually work at instead of just existing as a flat surface covered in stuff.
What It Actually Costs: Budget Tiers
Since a lot of people ask “what should I actually buy first” — here’s roughly how I’d break it down if I were starting from zero.
| Budget | What You Get | Best First Purchase |
|---|---|---|
| Under $50 | Command hooks/strips, tension rods, a couple of stacking risers | Kitchen pegboard or over-the-sink shelf — fastest visible payoff |
| $50–150 | Add a second closet rod, an over-toilet shelf, a ladder shelf | Closet second rod — biggest percentage gain per dollar |
| $150–300+ | Wall-mounted media console, floor-to-ceiling shelving unit, loft bed risers | Living room shelving wall — highest visual + functional impact |
Where I’d Start If I Were Doing This Over
If I had to redo my studio from scratch, I wouldn’t start with the living room, even though that’s the room people usually post about.
I’d start with the kitchen pegboard and the closet second rod, because those two projects took me a single weekend, cost under $80 combined, and made the two most-used rooms in the apartment feel functional instead of chaotic.
Everything else — the entryway hooks, the bathroom shelf, the living room wall — I added over the following few months as I had time and a little extra budget.
Vertical space isn’t a trend, it’s just math: in a small apartment, your walls and the air above your head are square footage you already own and aren’t using. You don’t need to fill every wall to the ceiling — you just need to be a little more intentional about which walls are working for you and which ones are just holding up paint.


Leave a Reply